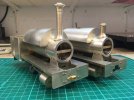
Scratch Building Darent in 16mm

Hobbyhorse

Western Thunderer
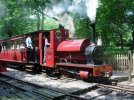
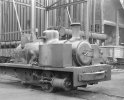
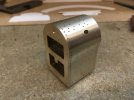
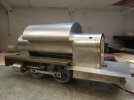
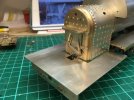
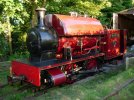
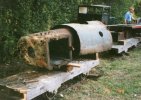
I've been posting occasionally bits about my Andrew Barclay Darent build in the workshop section, but its probably better to have its own thread. although the build is in the detailing stage I'll go back to the beginning. She was built in 1903 for the Provan Gas Works in Glasgow as a wing tank, and worked until the late 50's, some restoration did commence but sat in different locations until we purchased it bits.
I started the build after I sold the full size loco in 2012, I was one of four who owned the locoI purchased the loco in 1999 and spent the next four years restoring her. Originally built as 2' 6" gauge, our restoration was to re-gauge to 2' and add a saddle tank to run on a private line in Kent.
With my interest in garden railways 16mm gauge would be the ideal size, and as we had the loco running originally without a cab, then added the cab after a visit to the L&B in Devon I would construct two models.
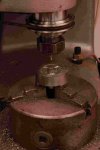
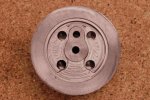
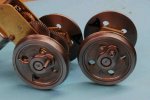
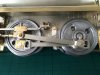
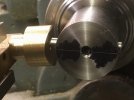
The first bits made was the wheels using cast iron, a pattern was made that had both versions on using a removable section. With the first stage done on the Pantograph and finished on the lathe.

Simon
AWTMSBJ.jpg
B90w2r2.jpg
XX4rnoE.jpg

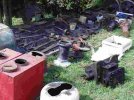
The bits after bringing them home to Kent.
hnANJ2X.jpg
cPC3m62.jpg

Construction under way.
JVtAg5P.jpg
FIX4Ip9.jpg
lZYpN19.jpg
h8MG0NY.jpg
vVPtJnx.jpg
 
Last edited:
Hobbyhorse

Western Thunderer
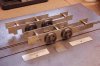
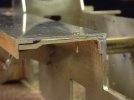
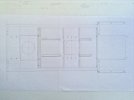
I spent quite a lot of time on the drawing board setting out the frames with all the holes needed, also woking out the bearings as space is very tight with all the valve gear and motor that's going to be fitted. The frames are cut from .9 nickel silver, with a jig used to part drill the holes required for the rivets to be pressed in. I've using roller bearings which with the framework of the bearing are only 4mm thick, no springing or compensation is used just allowing 2mm downward movement in the horns. The square spacers are temporary and will be replaced as the build progresses.

Simon

Wheeledchassis.jpg
Frames.jpg
Drilling Jig Buffer plates.jpg
 

Hobbyhorse

Western Thunderer
The next stage was constructing the the saddle, buffer beams, cylinders, weight shaft and making some patterns for the lubricators and weight shaft bearings.
As I wanted to fit some automated couplings I've been doing some development work on it, the couplings are the ones we use at Bredgar which I made a while ago. Using a spare ESU chip, servo driver board, and some small servos it does work, so next stage is to make it smaller to fit inside the saddle tanks.

Simon

 
Last edited:

Hobbyhorse

Western Thunderer
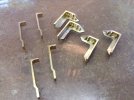
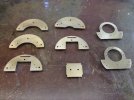
Some work on the brackets that support the running plate, cab floor and coupling pockets.
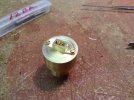
Spent quite a lot of time drawing up the boiler, smokebox, saddle and back plate. The first bit I'm going to do is the backplate, so made the pattern for it.
Simon
54838127396_f05ff64f50_b.jpg
54838372188_0ab5c94607_b.jpg
54838128171_6b0ba0d25f_b.jpg
54838125946_27a0799363_b.jpg
 
Last edited:
Hobbyhorse

Western Thunderer
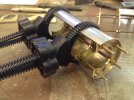
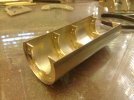
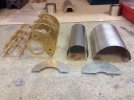
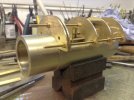
The construction of the boiler, smokebox and saddle tank used was fairly straightforward, using cages over which the 10 thou nickel silver is soldered. Most of the time was spent drawing and cutting out the cage parts, accuracy is key with all the parts screwing together.
Simon
54838354549_3cc9848071_b.jpg
54837256552_1a92e85425_b.jpg
54838366343_1f9d41646f_b.jpg
54838366948_5117eda0a2_b.jpg
54838447280_2c470d8c1d_b.jpg
54838124251_750374548f_b.jpg
54838368953_0cf2fdf87f_b.jpg
54837260267_9c20b0ea08_b.jpg
54838353694_424a9c0b6d_b.jpg
 
Last edited:
Hobbyhorse

Western Thunderer
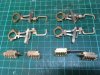
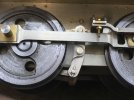
Making the motion and valve gear is one of my favourite parts of model making, as it certainly makes you think about the various setups needed to produce the parts, especially the rods that are cut on two planes, the photos should give you the idea.
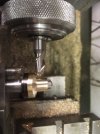
Most of the rods and links are cutout on the pantograph miller, with the vertical miller and lathes also playing a part, I prefer using machine tools as much as possible as it gives a crispness to the work, hand work is used mainly on the cleaning up of the bits.
It's taken quite a time making all these bits so I'll let the photos tell the story.

Simon

IMG_4039.jpeg IMG_2478 2.jpeg IMG_1974 2.jpeg IMG_1975 2.jpeg IMG_1973.jpg IMG_2461.jpeg IMG_2454.jpeg IMG_1964 2.jpeg IMG_1966.jpeg IMG_1969.jpg
 

Tom Mallard

Western Thunderer
Really great work, double thumbs up from me. Quite a different approach for you on some of the parts though.

Tom
 

Hobbyhorse

Western Thunderer
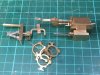
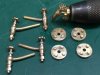
It's been a while but I've been thinking about how to manufacture the clack valves, so over the course of a couple of days these are the results. Other than the hand wheels which took the longest to make everything else was straight forward.

Next on the list is the injectors.

Simon.
IMG_4071.jpg IMG_4062.jpg IMG_4055.jpg IMG_4056.jpg IMG_4059.jpg IMG_4054.jpg
 

Hobbyhorse

Western Thunderer
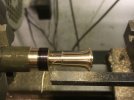
Time to get on with Darent as it's been three years since the last post. I've been working on the chimneys, it's one of the things I really enjoy making.
Using various jigs and tools speeds up producing them.
The shorter chimney was the easiest one to make because I've got the works drawings, but the taller one just relies on some notes and a few photos.
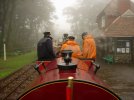
The reason for the taller chimney was because of a visit we made to the Linton & Barnstable line, shortly after finishing the restoration. The weather at the line was extremely wet and windy, so the decision to fit an enclosed cab and tall chimney was taken. We used the original base but cut off the tapered top, replacing it with a tube which came from a lamp post, and fitting a top which one of us had.

Ip9AjVC.jpg
1i0QQ8Y.jpg
FB2JZsK.jpg
5Wb0P0X.jpg
Pn01y2T.jpg
BcM9at6.jpg
b8KJZMJ.jpg
HqiL7wH.jpg


Simon
 

Scale7JB

Western Thunderer
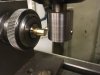
My workshop enthusiasm far outweighs my knowledge of tools and processes sadly. All part of living in a flat in East London, so if I may ask, what is the type of cutter used in the collet in the third photo of your most recent post?

It looks like it has a taper on it, is it home profiled/cut for the job?

JB.
 

Hobbyhorse

Western Thunderer
My workshop enthusiasm far outweighs my knowledge of tools and processes sadly. All part of living in a flat in East London, so if I may ask, what is the type of cutter used in the collet in the third photo of your most recent post?

It looks like it has a taper on it, is it home profiled/cut for the job?

JB.
The cutter is a standard bullnose 2 flute cutter, the size was chosen to suit the radius require.

Simon
 

Hobbyhorse

Western Thunderer
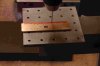
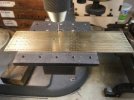
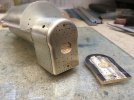
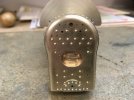
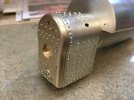
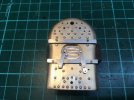
Cutting the backplate was a bit time consuming with a multitude of different holes sizes required for regulator, gauge frames, washout plugs, rivets etc, from 2mm down to .7mm. Those above 1mm used the cutting tools on the engraver, but the .7mm for the rivets used a slightly different approach. Firstly the location is spotted then drilled to size on the drill press.
N21zUl6.jpg
Jhp5Brc.jpg
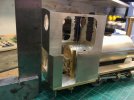
The frame for the firebox uses two endplates and three spacers, with access holes to enable fixing to the saddle and boiler. The backplate is fixed to the endplate using 12ba screws located in the recess that is the fire hole, and two other points that are stays with hex headed fixings. The fire hole fixings will be hidden by the doors.
mxy0QNO.jpg
FclnXJj.jpg
The wrapper uses the same rivets as the back plate, so with a lot of holes to drill in thin nickel silver a drilling template in brass was made first. Rolling the wrapper did cause a bit of distortion because of the holes, but was easily removed with some emery cloth.
The radius on the back plate was hand filed with a small guide to help.
L4b4H8t.jpg
PKWQTL0.jpg
oZoCbZ5.jpg
lZ8b1Cw.jpg
Before applying the rivets to the backplate the small additional thickening plate that allows the blowdown valve to be fixed to the bottom was made. The rivets required two different methods of fixing, those on the wrapper are soldered in, and the backplate ones glued in from the rear. A little bit of cleaning up is needed with solder around rivets, bit other than that I'm well pleased with the result.
82Y4SQc.jpg
OiURoqC.jpg
7lexNn3.jpg
Next is the firehouse runners and doors, these will hide the two fixing points.

Simon
 

Hobbyhorse

Western Thunderer
After a very wet and windy trip with Darent to the Linton & Barnstable Railway it was decided to fit a cab. So with one model fitted with the cab it would portray her in both guises, although I do prefer her without the cab.
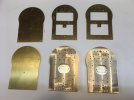
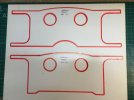
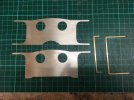
Using the drawings we made for the cab it was just a case of reducing the scale to produce the patterns for the miller. Cut from 10 thou nickel silver these folded up easily, and when soldered with the bottom fixing strips and to the roof made them quite robust. Small bolts are used to fix the cab to the cab sheets. The small slot in the back sheet angled piece was to allow the coupling to be seen while coupling up. The cab windows are simple turnings that incapsulate the glass when both are fitted, after painting is completed.
dqbbiS6.jpg
njBhr9X.jpg
S4m86zx.jpg
rry4L6g.jpg
jnHfOLC.jpg
NAIFxfV.jpg
bkb9Mjh.jpg
xxKzJdU.jpg
rEywSMz.jpg
Simon
 

Hobbyhorse

Western Thunderer
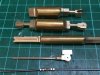
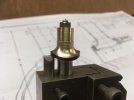
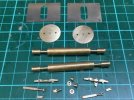
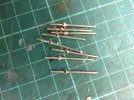
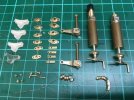
After deliberating which way to make the safety valves, I decided to follow the prototype exactly which meant some quite small parts, especially the buckle at the pivoting end of the valve. In the end I made the actual valve drop into the housing, this gives the correct shape to the valve tops. The rest of the part are straightforward machined parts, except the springs which took the longest to make. The cover plates have also been made, but not fitted yet as the hand rails need to be made.
zRuExXB.jpg
LHwo5fe.jpg
qZrDl25.jpg
wEv2Iul.jpg

Simon
 

Hobbyhorse

Western Thunderer
I've been scratching my head for a while about making the hand rail stanchions, luckily Darent doesn't have many only for the safety valves.
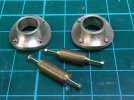
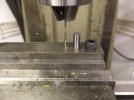
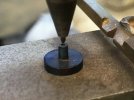
So after sourcing some brass balls of the correct diameter, the fun started. First a jig was made to hold the ball and the rod, the balls needed drilling twice, once to get the hole for the rod and then again when the rod was soldered on. Before drilling the balls needed softening as those supplied were in hard condition, the blow torch sorted that out.
A small washer was turned and the end of the bars threaded, then attached to the models. I did have some wastage drilling the balls but its easy with the jig to redo so more.
aHAR47M.jpg
heEYNC8.jpg
4q4mDT2.jpg
VGsRGqi.jpg
5rvvqFZ.jpg
Simon
 

Hobbyhorse

Western Thunderer
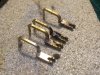
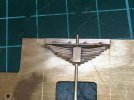
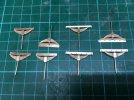
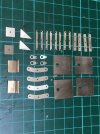
I've been quite productive starting with the springs.
Normally I not the greatest fan of making springs, as it was part of the day job a while ago, but these I have enjoyed.
Started by making the assembly jig and new anvil for the rivet punch to enable the brass angle to be riveted.
All 8 springs are the same, the only difference is in the angle brackets.
N2rN4ww.jpg
2lLyMxN.jpg
e1Palg7.jpg
BF9NDdk.jpg
gc3GNd7.jpg
Next was the firehole doors, runners and tray. These have to operate to cover the fixing screws in the door recesses.
cHgI7vX.jpg
X4ciWEg.jpg
3iViX3x.jpg
And lastly the brakes which are very simple on Darent acting on only one wheel and the rear boiler support.
2vVoqq1.jpg
a7p4YMH.jpg
hewwBpD.jpg
RDSDNHq.jpg
OUYuiE9.jpg
euR1LT3.jpg
9g1SxdP.jpg
Well that's a lot of work but adding these details is certainly bring her to life.
Next on the list is the reverser.

Simon
 
Last edited:
Hobbyhorse

Western Thunderer
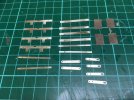
I’ve been putting off doing the reversers as it has required quite a bit of effort with the parts required for them. First on the list was to do a drawing to produce the patterns for the links, arms, bases and handles, then cut these on the pantograph. With these most of the bits have been silver soldered, as this provides invisible joints once cleaned up and stronger. Not fitted them yet as I’m doing everything that’s required inside the frames to be completed, then stripe down the frames and fit them everything in one go, anyway thats another bit ticked off the list.
eZ1J2Q9.jpg
x8sdTuZ.jpg
lilDWuT.jpg
JdAeI9z.jpg
Wm2gGdx.jpg
tAUm7DO.jpg
mnGjg20.jpg
Simon
 
Last edited:
Top